CentOS 8 설정
podman.shockz.io
OS 버전 확인
$ cat /etc/redhat-release
$ cat /etc/os-release
$ cat /etc/system-release
$ hostnamectl

# 커널 버전 확인
$ uname -s -r
$ uname -a
$ uname -v
update
참고: CentOS 설정 참고2: CentOS 8 설치 후 기본 설정
- yum -> dnf
EPEL(Extra Packages of Enterprise Linux) 저장소 리스트 위치 (/etc/yum.repos.d)
$ sudo dnf upgrade
$ bzip2 /etc/yum.repos.d/CentOS-*.repo # 백업
$ rename -v .repo .bak *.repo # 확장자 변경- 저장소 단일파일 관리
$ vi /etc/yum.repos.d/default.repo

[AppStream]
name=CentOS-$releasever - AppStream
#mirrorlist=http://mirrorlist.centos.org/?release=$releasever&arch=$basearch&repo=AppStream&infra=$infra
##baseurl=http://mirror.centos.org/$contentdir/$releasever/AppStream/$basearch/os/
baseurl=http://mirror.kakao.com/$contentdir/$releasever/AppStream/$basearch/os/
gpgcheck=1
enabled=1
#gpgkey=file:///etc/pki/rpm-gpg/RPM-GPG-KEY-centosofficial
gpgkey=http://mirror.kakao.com/centos/RPM-GPG-KEY-CentOS-Official

[BaseOS]
name=CentOS-$releasever - Base
#mirrorlist=http://mirrorlist.centos.org/?release=$releasever&arch=$basearch&repo=BaseOS&infra=$infra
##baseurl=http://mirror.centos.org/$contentdir/$releasever/BaseOS/$basearch/os/
baseurl=http://mirror.kakao.com/$contentdir/$releasever/BaseOS/$basearch/os/
gpgcheck=1
enabled=1
#gpgkey=file:///etc/pki/rpm-gpg/RPM-GPG-KEY-centosofficial
gpgkey=http://mirror.kakao.com/centos/RPM-GPG-KEY-CentOS-Official


[extras]
name=CentOS-$releasever - Extras
#mirrorlist=http://mirrorlist.centos.org/?release=$releasever&arch=$basearch&repo=extras&infra=$infra
##baseurl=http://mirror.centos.org/$contentdir/$releasever/extras/$basearch/os/
baseurl=http://mirror.kakao.com/$contentdir/$releasever/extras/$basearch/os/
gpgcheck=1
enabled=1
#gpgkey=file:///etc/pki/rpm-gpg/RPM-GPG-KEY-centosofficial
gpgkey=http://mirror.kakao.com/centos/RPM-GPG-KEY-CentOS-Official- epel reinstall
$ dnf reinstall epel-release- remi repo install
$ dnf reinstall https://rpms.remirepo.net/enterprise/remi-release-8.rpm
# remi repo는 기본적으로 활성화되어 있지 않음 -> 활성화 필요
# enabled=1 로 변경
systemctl 사용법
- 서비스 재실행(sshd 의 경우)
systemctl restart sshd.service - 서비스 중지(sshd 의 경우)
systemctl stop sshd.service - 서비스 시작(sshd 의 경우)
systemctl start sshd.service - 서비스 상태보기(sshd 의 경우)
systemctl status sshd.service - 부팅시 서비스 시작하기(sshd 의 경우)
systemctl enable sshd.service - 부팅시 서비스 시작하지 않음(sshd 의 경우)
systemctl disable sshd.service - 부팅시 실행되는 서비스인지 검사(sshd의 경우)
systemctl is-enabled sshd - 서비스 목록보기
systemctl list-unit-files --type=service
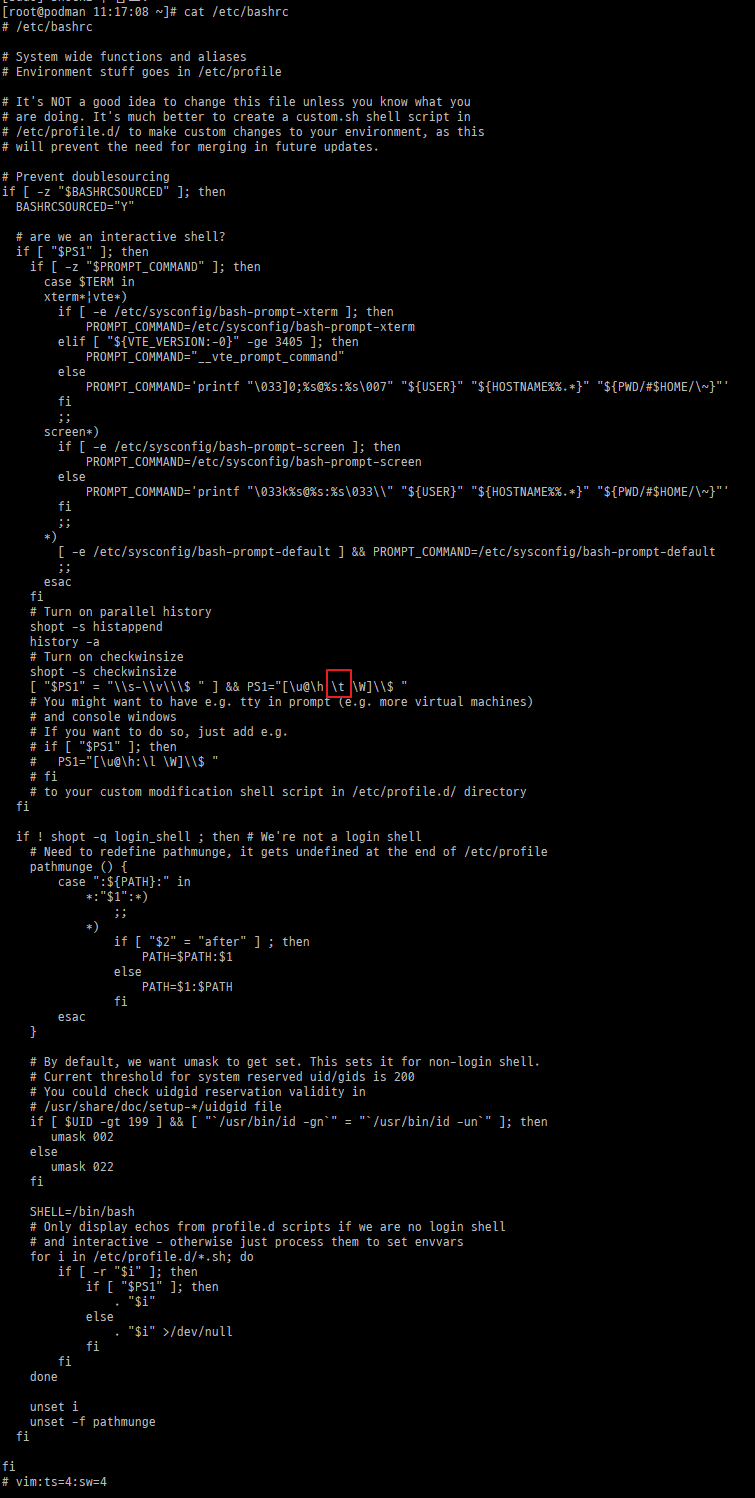
/etc/bashrc 수정

Podman 설치
https://podman.io/getting-started/installation.html
열린 포트 확인
$ netstat -tnlp
Active Internet connections (only servers)
Proto Recv-Q Send-Q Local Address           Foreign Address         State       PID/Program name
tcp        0      0 0.0.0.0:111             0.0.0.0:*               LISTEN      1/systemd
tcp        0      0 0.0.0.0:80              0.0.0.0:*               LISTEN      21382/nginx: master
tcp        0      0 192.168.122.1:53        0.0.0.0:*               LISTEN      2886/dnsmasq
tcp        0      0 0.0.0.0:22              0.0.0.0:*               LISTEN      18685/sshd
tcp        0      0 0.0.0.0:5432            0.0.0.0:*               LISTEN      1279/postmaster
tcp        0      0 127.0.0.1:44321         0.0.0.0:*               LISTEN      2026/pmcd
tcp        0      0 127.0.0.1:4330          0.0.0.0:*               LISTEN      12396/pmlogger
tcp6       0      0 :::111                  :::*                    LISTEN      1/systemd
tcp6       0      0 :::80                   :::*                    LISTEN      21382/nginx: master
tcp6       0      0 :::22                   :::*                    LISTEN      18685/sshd
tcp6       0      0 :::5432                 :::*                    LISTEN      1279/postmaster
tcp6       0      0 ::1:44321               :::*                    LISTEN      2026/pmcd
tcp6       0      0 :::9090                 :::*                    LISTEN      1/systemd
tcp6       0      0 ::1:4330                :::*                    LISTEN      12396/pmlogger

$ lsof -i -nP | grep LISTEN | awk '{print $(NF-1)" "$1}' | sort -u
*:111 rpcbind
*:111 systemd
*:22 sshd
*:5432 postmaste
*:80 nginx
*:9090 systemd
127.0.0.1:4330 pmlogger
127.0.0.1:44321 pmcd
192.168.122.1:53 dnsmasq
[::1]:4330 pmlogger
[::1]:44321 pmcd

$ nmap localhost
Starting Nmap 7.70 ( https://nmap.org ) at 2020-08-10 12:12 KST
Nmap scan report for localhost (127.0.0.1)
Host is up (0.0000060s latency).
Other addresses for localhost (not scanned): ::1
Not shown: 995 closed ports
PORT     STATE SERVICE
22/tcp   open  ssh
80/tcp   open  http
111/tcp  open  rpcbind
5432/tcp open  postgresql
9090/tcp open  zeus-admin

Nmap done: 1 IP address (1 host up) scanned in 1.61 seconds
firewall-cmd
--permanent
--permanent 옵션을 붙이면 설정파일(.xml)이 수정되는데, 정상 반영되려면 반드리 reload를 해야한다. (#firewall-cmd --reload)
--permanent 옵션을 붙이지 않으면, 일시적으로 즉시 반영되고 재부팅 시 룰 삭제 된다 (설정파일에 반영 안되어 있으므로...)
$ firewall-cmd --list-all-zone
$ firewall-cmd --get-default-zone
$ firewall-cmd --zone=public --list-all
$ firewall-cmd --zone=public --list-ports
$ firewall-cmd --zone=public --add-port=22581/tcp
$ firewall-cmd --zone=public --add-port=8080-8082/tcp
$ firewall-cmd --zone=public --remove-port=22581/tcp
$ firewall-cmd --zone=public --list-service
$ firewall-cmd --zone=public --add-service=telnet
기본 Nginx 설정
www-data user add & /var/www 설정
$ useradd --shell /sbin/nologin www-data
$ mkdir -p /var/www/podman.shockz.io/html
$ mkdir -p /var/www/api.shockz.io
$ chown -R www-data:www-data /var/www/podman.shockz.io/html
$ chown -R www-data:www-data /var/www/api.shockz.io
$ chmod -R 755 /var/www
nginx.conf 파일 설정
# worker 프로세스를 실행할 사용자 설정
# - 이 사용자에 따라 권한이 달라질 수 있다.
user  nginx;
# 실행할 worker 프로세스 설정
# - 서버에 장착되어 있는 코어 수 만큼 할당하는 것이 보통, 더 높게도 설정 가능
worker_processes  8;

# 오류 로그를 남길 파일 경로 지정
error_log  /var/log/nginx/error.log warn;
# NGINX 마스터 프로세스 ID 를 저장할 파일 경로 지정
pid        /var/run/nginx.pid;


# 접속 처리에 관한 설정을 한다.
events {
    # 워커 프로레스 한 개당 동시 접속 수 지정 (512 혹은 1024 를 기준으로 지정)
    worker_connections  2048;
}

# 웹, 프록시 관련 서버 설정
http {
    # mime.types 파일을 읽어들인다.
    include       /etc/nginx/mime.types;
    # MIME 타입 설정
    default_type  application/octet-stream;

    # 엑세스 로그 형식 지정
    log_format  main  '$remote_addr - $remote_user [$time_local] "$request" '
                      '$status $body_bytes_sent "$http_referer" '
                      '"$http_user_agent" "$http_x_forwarded_for"';

    # 엑세스 로그를 남길 파일 경로 지정
    access_log  /var/log/nginx/access.log  main;

    # sendfile api 를 사용할지 말지 결정
    sendfile        on;
    #tcp_nopush     on;

    # 접속시 커넥션을 몇 초동안 유지할지에 대한 설정
    keepalive_timeout  65;

    # (추가) nginx 버전을 숨길 수 있다. (보통 아래를 사용해서 숨기는게 일반적)
    server_tokens off

    #gzip  on;

    # /etc/nginx/conf.d 디렉토리 아래 있는 .conf 파일을 모두 읽어 들임
    include /etc/nginx/conf.d/*.conf;
}
/etc/nginx/sites-available/api.shockz.io
server {
    listen       80;
    server_name  api.shockz.io;
    charset utf-8;
    rewrite_log  on;
    access_log  /var/log/nginx/api.shockz.io.access.log  main;
    error_log  /var/log/nginx/api.shockz.io.error.log  notice;
    client_max_body_size 100M;
        root            /var/www/api.shockz.io;
        index           index.html;
    #location = /favicon.ico { access_log off; log_not_found off; }
    #location = /robots.txt  { access_log off; log_not_found off; }
}

$ ln -s /etc/nginx/sites-available/api.shockz.io /etc/nginx/sites-enabled
$ nginx -t
$ systemctl reload nginx
Let's Encrypt Wildcard SSL 적용 (nas.shockz.io SSL 이용)
위치: /usr/syno/etc/certificate/system/default)
# default
# Settings for a TLS enabled server.

    server {
        listen       443 ssl http2 default_server;
        listen       [::]:443 ssl http2 default_server;
        server_name  _;
        root         /var/www/podman.shockz.io/html;

        ssl_certificate "/etc/pki/nginx/fullchain.pem";
        ssl_certificate_key "/etc/pki/nginx/private/privkey.pem";
        ssl_session_cache shared:SSL:1m;
        ssl_session_timeout  10m;
        ssl_ciphers PROFILE=SYSTEM;
        ssl_prefer_server_ciphers on;

#        # Load configuration files for the default server block.
        include /etc/nginx/default.d/*.conf;

        location / {
        }

        error_page 404 /404.html;
            location = /40x.html {
        }

        error_page 500 502 503 504 /50x.html;
            location = /50x.html {
        }
    }
}

# api.shockz.io
server {
    listen      443;
    server_name api.shockz.io;
    charset     utf-8;
    rewrite_log on;
    access_log  /var/log/nginx/api.shockz.io.access.log main;
    error_log   /var/log/nginx/api.shockz.io.error.log  notice;
    client_max_body_size 100M;
    root        /var/www/api.shockz.io;
    index       index.html;
}

# firewall 적용 필요
$ firewall-cmd --zone=public --add-port=443/tcp --permanent
$ firewall-cmd --reload

# default, api.shockz.io 의 conf 에 https redirect 적용
server {
   ...
   return 301 https://$host$request_uri
   ...
}
# e.g. http://api.shockz.io -> https://api.shockz.io 로 redirect
참고
스타트업 개발자 혼자 빠르게 싸게 서버 구축하기 - 1편
스타트업 개발자 혼자 빠르게 싸게 서버 구축하기 - 2편
스타트업 개발자 혼자 빠르게 싸게 서버 구축하기 - 3편
[Nginx] Nginx HTTP redirect 및 포트포워딩(Port Forwarding) 설정
NGINX VIRTUALHOST
nginx 에 HTTPS/SSL 적용하기
node.js 개발 및 호스팅 환경 설정
nvm 설치
# 개별 사용자별 nvm 설치
$ sudo dnf update
$ curl -o- https://raw.githubusercontent.com/nvm-sh/nvm/v0.35.3/install.sh | bash
# 추가되는 변수
# export NVM_DIR="$HOME/.nvm"
# [ -s "$NVM_DIR/nvm.sh" ] && \. "$NVM_DIR/nvm.sh"  # This loads nvm
# [ -s "$NVM_DIR/bash_completion" ] && \. "$NVM_DIR/bash_completion"  # This loads nvm bash_completion
$ source ~/.bash_profile
$ nvm list-remote v10
$ nvm list-remote v12
$ nvm install 12
$ nvm install 10
$ nvm use v12
$ node --versiondocker 테스트를 위한 작업
$ cd ~/howto/nodetest
$ npm init -y
$ npm i express # 테스트를 위한 익스프레스 서버
server.js
var express = require('express');
var app = express();

app.get('/', function (req, res) {
  res.send('hi there');
});

app.listen(3000, function () {
  console.log('running on 3000 port');
});$ node server.js
$ curl localhost:3000
# hi there
$ echo "# podman-sample-for-test" >> README.md
$ git init
$ git add README.md
$ git commit -m "initialize git repository"
$ git remote add origin https://github.com/shockzinfinity/podman-sample-for-test.git
$ git push -u origin master
# for docker
$ podman login -u shockz docker.io
$ podman logout
$ podman push
$ podman ps -a
$ podman images
$ podman system prune -a
$ podman build -t shockz/nodetest:0.2 .
$ podman run -it -p 3000:3000 --rm --name node shockz/nodetest:0.2
$ podman run -it -p 3000:3000 --rm --name node -v ~/howto/nodetest:/usr/src/nodetest shockz/nodetest:0.2
$ sudo firewall-cmd --zone=public --add-port=3000/tcp # for test
$ npm i mongoose
# mongodb 테스트를 위한 원격 확인을 위해 27017 포트 오픈 (MongoDB Compass 로 확인)
$ sudo firewall-cmd --zone=public --add-port=27017/tcp
# mongodb 컨테이너 run
$ podman run -d -p 27017:27017 --rm --name mongodb -e MONGO_INITDB_ROOT_USERNAME=root -e MONGO_INITDB_ROOT_PASSWORD=***** mongo
# compass 로 확인 후 연결문자열 복사
# e.g. mongodb://root:*****@localhost:27017/?authSource=admin&readPreference=primary&appname=MongoDB%20Compass&ssl=false
$ podman stop mongodb
# db 데이터가 저장될 볼륨 생성
$ podman volume create mongodb_dev
$ podman volume ls
$ podman run -d -p 27017:27017 --rm --name mongodb -e MONGO_INITDB_ROOT_USERNAME=root -e MONGO_INITDB_ROOT_PASSWORD=***** -v mongodb_dev:/data/db mongo
# 여기까지 진행하면 데이터 볼륨 연결을 통해 로컬에서 DB 연결까지는 마무리 할수 있으나,
# 이제 각 컨테이너 간 네트워크 부분에서 docker-compose 를 이용하여 서비스간 연결을 맺어줘야 하는 부분에서
# docker-compose 의 podman alternative 가 마땅치 않음..net core 개발 및 호스팅 환경 설정
$ dnf info dotnet
$ dnf -y install dotnet
$ dotnet --version
vim color scheme 지정
vim 컬러 테마 위치 : /usr/share/vim/vim80/colors (vim80 은 버전) molokai.vim
$ curl https://raw.githubusercontent.com/tomasr/molokai/master/colors/molokai.vim > /usr/share/vim/vim80/colors/molokai.vimcodeschool.vim
$curl https://raw.githubusercontent.com/flazz/vim-colorschemes/master/colors/codeschool.vim > /usr/share/vim/vim80/colors/codeschool.vim/etc/vimrc
~/.vimrc
colo molokai # 추가
syntax on # 추가
putty 를 위해서 .vimrc 에 추가 참고
if &term =~ "xterm"
    "256 color --
    let &t_Co=256
    " restore screen after quitting
    set t_ti=ESC7ESC[rESC[?47h t_te=ESC[?47lESC8
    if has("terminfo")
        let &t_Sf="\ESC[3%p1%dm"
        let &t_Sb="\ESC[4%p1%dm"
    else
        let &t_Sf="\ESC[3%dm"
        let &t_Sb="\ESC[4%dm"
    endif
endif
Cockpit SSL 설정
WARNING
2020-09-02 기준
- remotectl certificate 커맨드상의 selinux 관련 예러 해결 안됨
- synology 역방향 프록시 설정으로 연결한 경우 정상적으로 인증서 적용안됨 (dev.shockz.io 로 연결 시에는 오류, https://192.168.0.117:9090 으로 연결시에는 접속은 가능)
자체서명 인증서 적용을 고려
$ remotectl certificate
# synology 에서 발급 받은 shockz.io 와일드 카드 인증서 사용
$ cat /home/shockz/fullchain.pem /home/shockz/privkey.pem >> /etc/cockpit/ws-certs.d/api.shockz.io.cert
$ chmod 0640 dev.shockz.io.cert
$ chown :cockpit-ws dev.shockz.io.cert
$ systemctl restart cockpit
TIP
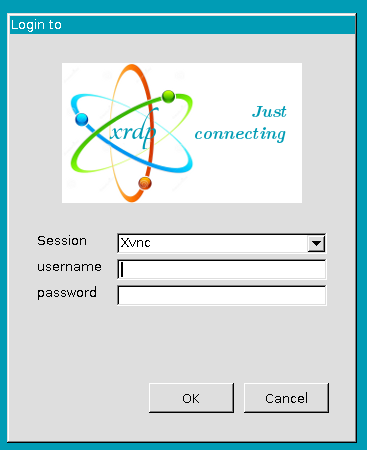
XRDP 설치
- 윈도우의 원격데스크탑을 통해 CentOS 8의 GUI 에 연결하기 위한 패키지 설치
$ sudo dnf info epel-release
$ sudo dnf update epel-release
$ sudo dnf install xrdp tigervnc-server

$ sudo firewall-cmd --list-all
$ sudo firewall-cmd --add-port=3389/tcp --permanent
$ sudo firewall-cmd --reload

$ sudo systemctl start xrdp
$ sudo systemctl status xrdp


- (선택) 포트 변경
# /etc/xrdp/xrdp.ini
[Globals]
...
port=3390
...

$ sudo firewall-cmd --add-port=3389/tcp --permanent
$ sudo firewall-cmd --reload

$ sudo systemctl restart xrdp